Slit Lamp Indirect Ophthalmoscopy
by S.Barnard. BSc(Hons).FCOptom.DCLP.FAAO.and A.Field..MSc.FCOptom.DCLP.FAAO.
 |
This picture gives a typical slit view of the fundus as seen
with a BIO lens, with the surrounding fundus illuminated by
scattered light.
Click on the fundus picture for an ophthalmoscopy simulation
|
The aim should be to view every patient with the BIO lens, dilated or non-dilated as necessary.
Small pupils and small fundus defects will need to be viewed under higher magnification and with the direct ophthlamoscope as well.
The picture above illustrates the type of slit fundus image view
obtained.
The surrounding fundus is normally seen as a dark background
illuminated by scattered light.
Scan the fundus with the slit beam as you would the cornea.
Preparation.
- Darken room as much as possible, so that minimum lamp intensity can be used.
- Make sure you can get a comfortable position with elbows on table if possible.
- Dilate patient, 0.5% or 1% Tropicamide plus 2.5% Phenylephrine if necessary.
Dilation is not necessary with all patients reporting for routine examination.
Ophthalmoscopy is possible with a 3mm pupil.
Some stereo is possible with a 5mm pupil, the lens needs to be centred carefully however.
SLM Settings.
- Set magnification between 15 to 30 times.
The lower magnification is easier to use at first. - Set slit approximately 1˝-2˝ mm wide and 5-10 mm long (when in focus).
- Set lamp intensity at minimum usable, about half-way.
- Set lamp and microscope at 90° to patient.
- Set slit focus on the pupil centre.
Getting the patient ready.
- Patient's chin on chin-rest.
- Patient fixates directly ahead or slightly to one side at first.
- Position SLM so that focussed image of slit covers the pupil.
- Introduce the BIO lens, move to get pupil in the centre, and about 1 cm from eye.
Most Volk SLM lenses are bi-convex and symmetrical, and it is not important which way round they are.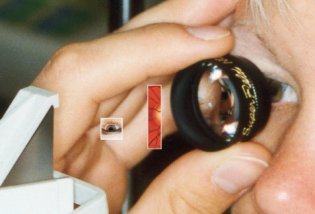
Photograph showing aerial fundus image.
(Not normally visible from side)
The procedure.
Method A. (Moving from close and pulling back)
- Position the patient comfortably at the slit lamp microscope.
- Instruct the patient to fixate a target straight ahead.
- Focus the slit lamp beam onto the patient's pupil.
- Interpose the BIO lens centrally and at about 1cm from the eye.
It is not important which way round the BIO lens is held. - The SLM should then be pulled backward towards the practitioner and within about 1 cm,
the microscope will focus on the BIO lens, continue pulling back and within another 1cm
the microscope will focus on the aerial image of the fundus.
This image is between the BIO lens and the SLM objectives.
Method B. (Moving from pulled back position and closing in)
- Position the patient comfortably at the slit lamp microscope.
- Instruct the patient to fixate a target straight ahead.
- Pull the SLM back towards the practitioner and laterally align the slit beam so that the blurred slit beam illuminates the centre of the patient's pupil.
- Interpose the BIO lens centrally and at about 2 cm from the eye.
Again it is not important which way round the BIO lens is held. - The SLM should then be moved forwards towards the patient and
focussed on the aerial image of the patient's inverted pupil.
and then continue moving forwards to focus through the pupil onto the retina.
This image is between the BIO lens and the aerial image of the pupil/iris.
The BIO lens should then be moved forwards towards the patient to enlarge the pupil image and by doing so, increase the field of view.
For both of the above methods.
- The fundus may then be examined by scanning across the field
of view in a similar fashion to the method employed when examining the cornea.
N.B.
The illuminated slit image of the fundus is seen within a wide dark fundus background illuminated by scattered light.
The slit image is about 1 to 2 disc diameters wide, and about 10 disc diameters high, depending on the initial slit beam settings. - To record fundus details on the patient's record, turn the record card through 180° and make any necessary drawings.
Fine tuning of the initial view.
- When moving the BIO lens with a non-dilated pupil, apply a circulatory movement to optimise correct centration.
- If you loose the fundus image, remove the lens, and try again.
The patient may have moved fixation and set your system out of alignment, or squeezed lashes in the way. - With a small pupil, a larger field can be viewed by moving the BIO lens and the SLM horizontally, in the same direction and tilting the lens at the same time. Tilting the lens will reduce distortion and also help to widen the field of view.
- The ICE technique (Imaginary Convex Eye)
If you imagine the fundus to be convex and not concave, it will help you direct the patient's eye in the correct direction when you need to extent the fundus view. This works well with the head-band BIO as well, aiding your movements around the fundus. - It is sometimes helpful to move the slit beam slightly to one side of the microscope.
This can reduce reflections. You will then need to move the Volk lens slightly in the same direction to view the fundus again.
Reducing the slit beam width will also reduce reflections.